

Top 12 Ink Tank Printers in 2023: A Comprehensive Review and Buying Guide
12 Best Ink Tank Printer in 2023 Welcome to our comprehensive review and buying guide for the top 12 ink tank printers in 2023. In today’s digital …
Read Article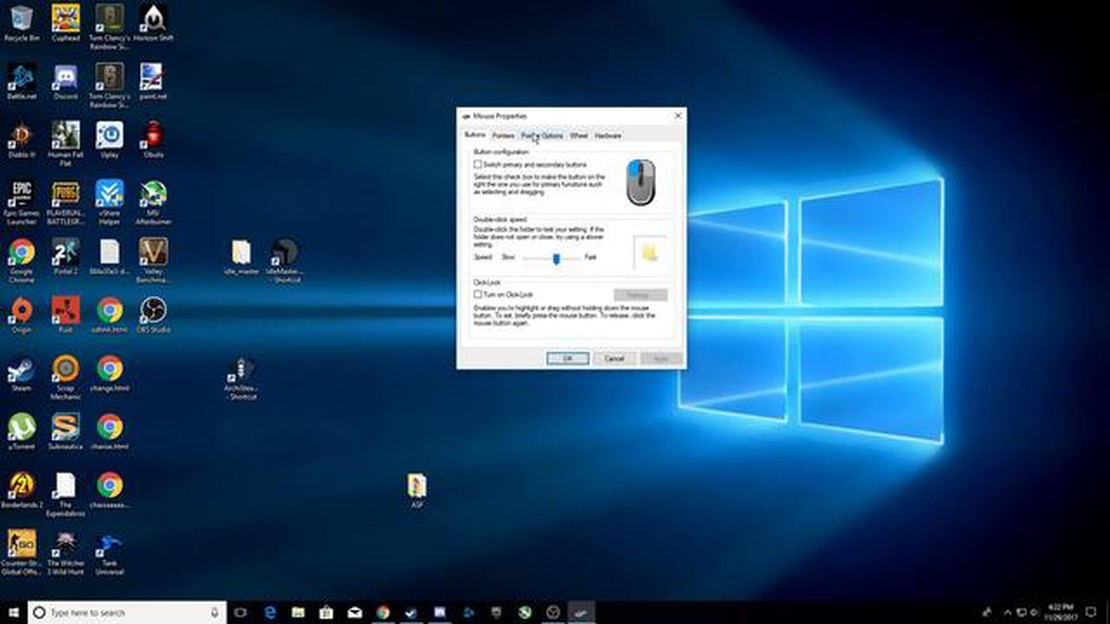
Mouse acceleration in Windows 10 operating system can be a useful feature for many users, but sometimes it can cause discomfort and make it difficult to control the cursor accurately. If you are experiencing problems due to mouse acceleration or simply prefer to disable it, this article will show you how to do so.
The first step to disable mouse acceleration in Windows 10 is to open the Settings menu. To do this, right-click on the Start button in the bottom left corner of the screen and select Settings. You can also press the Win + I key combination to quickly open the Settings menu.
Once the Settings menu is open, select the Devices section and click on the Mouse tab. Here you will see various settings related to the mouse. In the relevant section, find the “Mouse acceleration” option and toggle it to the “Disabled” position.
After that, mouse acceleration will be completely disabled in Windows 10 operating system. Now the cursor will move at the same speed regardless of the mouse movement force. If you want to change the speed of the cursor movement, you can customize this in the same Mouse section of the Options menu.
Disabling mouse acceleration in Windows 10 can be a useful solution for those who work with precision graphics applications, games, or simply prefer a more predictable cursor behavior. Follow our step-by-step instructions to quickly and easily disable mouse acceleration and customize cursor movement to your liking.
Read Also: Fix Your Samsung Galaxy S5 SD Card Problems: Step-by-Step Guide (Part 1)
Mouse acceleration in Windows 10 is a feature that increases the speed of mouse pointer movement based on the speed of your mouse movement. This means that the faster you move the mouse, the more the pointer moves across the screen. Mouse acceleration is designed to make working with large screens easier and allows you to move more quickly through the operating system interface.
However, mouse acceleration can be frustrating and inconvenient for some users. For example, when drawing or other precise operations, mouse acceleration can cause problems and make it difficult to position the pointer accurately.
If you want to disable mouse acceleration in Windows 10, you need to go to mouse settings and change the corresponding setting. This can be done as follows:
After performing this operation, mouse acceleration will be disabled and the pointer will move at a constant speed regardless of the mouse speed.
Mouse acceleration is a feature that changes the speed of the cursor relative to the speed of physical mouse movement. In Windows 10, this can cause discomfort and make it difficult to position the cursor accurately. This article will provide step-by-step instructions on how to disable mouse acceleration in Windows 10.
After performing these steps, mouse acceleration will be disabled and the cursor movement speed will remain constant regardless of the physical mouse movement speed.
Read Also: How To Troubleshoot Netflix App Not Working On Windows
After disabling mouse acceleration in Windows 10, you can check the changes and adjust the mouse speed. This will allow you to determine what value is most comfortable for you.
Remember that each person prefers different mouse speeds, so adjust to your individual preferences.
Some users prefer to use a mouse without acceleration because it provides more predictable and accurate cursor movement. Without mouse acceleration, the cursor movement speed will be constant regardless of the mouse speed, which can be useful for precise cursor positioning when working with programs that require high precision.
Yes, there are other ways to disable mouse acceleration in Windows 10. One of them is to use third-party programs that allow you to customize your mouse settings, including acceleration. Some of these programs include MouseFix and MarkC Mouse Acceleration Fix. However, using third-party programs may require additional installation and configuration.
12 Best Ink Tank Printer in 2023 Welcome to our comprehensive review and buying guide for the top 12 ink tank printers in 2023. In today’s digital …
Read Article
4 Best Book Creator Apps for Android in 2023 In today’s digital age, creating your own book has never been easier. With the incredible advancements in …
Read Article
Whatsapp delete for everybody doesn’t work for media files sent to iphone users Whatsapp delete for everybody is a feature that allows users to delete …
Read Article
How do I change my number when I call? Sometimes you may need to hide your phone number when calling to protect your personal information or just to …
Read Article
How to Enable Media Volume Limit on Samsung Galaxy S21 Quick Guide: How to Enable Media Volume Limit on Samsung Galaxy S21If you own a Samsung Galaxy …
Read Article
What to do with old smartphones? 15 ingenious reuse ideas We live in an era of rapid technological advancement, where old smartphones become obsolete …
Read Article


