


Samsung Galaxy S23 Ultra review: Epic Screen On Time Battery Life
Review: Samsung Galaxy S23 Ultra offers an incredible screen and long-lasting battery life The Samsung Galaxy S23 Ultra has been making waves in the …
Read Article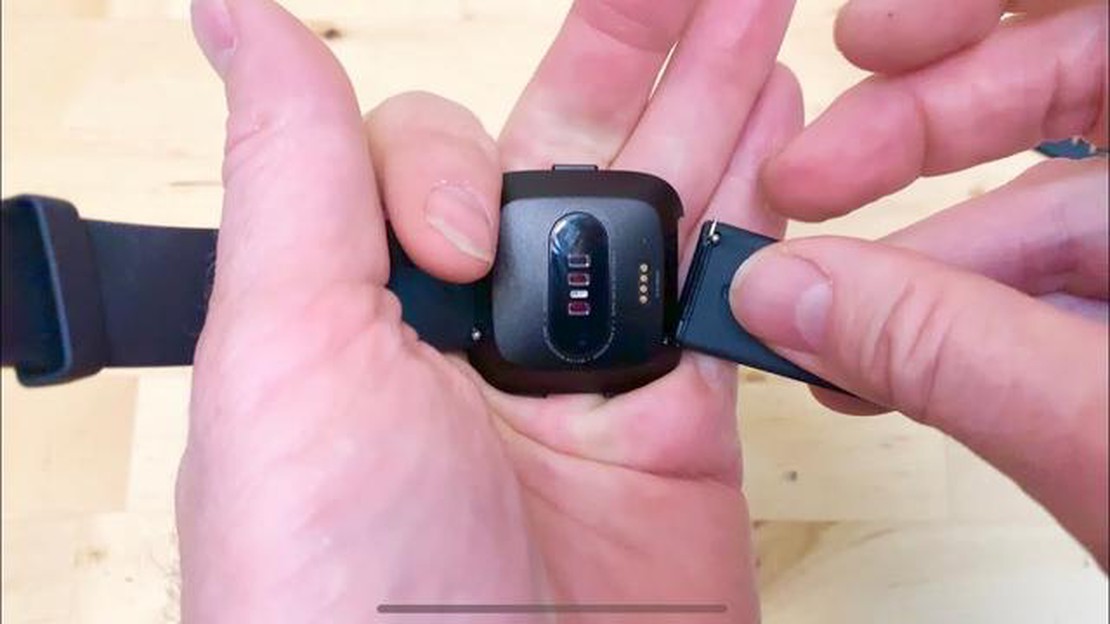
Are you tired of the same old look of your Fitbit Versa? Do you want to change up your style and add a personal touch to your fitness tracker? Well, the good news is that you can easily change the bands on your Fitbit Versa and replace them with a variety of stylish options.
Whether you’re looking to swap out your current band for a different color or pattern, or you want to upgrade to a more comfortable or durable material, this step-by-step guide will walk you through the process of changing your Fitbit Versa bands with ease.
First, you’ll need to select the new bands that you want to use with your Fitbit Versa. There are countless options available, from silicone bands for workouts to leather and metal bands for a more sophisticated look. Choose the bands that suit your style and preferences.
Once you have your new bands ready, it’s time to take off the old ones. Start by turning over your Fitbit Versa and locating the quick-release pins on the back of the device. Use your finger or a small tool to press the release button on each pin and slide the band out of the slot. Repeat this process for the other side of the device.
Now that you’ve removed the old bands, it’s time to attach the new ones. Line up the pins on the new band with the slots on the back of the Fitbit Versa and gently slide them in. You should hear a click sound when the pins are securely in place. Repeat this process for the other side of the device.
And there you have it! You’ve successfully changed the bands on your Fitbit Versa and replaced them with your preferred accessory bands. Now you can enjoy a fresh new look for your fitness tracker and show off your personal style wherever you go.
Read Also: Top 7 Android Radios For Car in 2023 - The Ultimate Guide
The Fitbit Versa is a popular smartwatch that allows you to track your fitness and receive notifications from your smartphone. One of the great features of the Fitbit Versa is the ability to change the bands, allowing you to customize the look of your watch and match it to your style or outfit. If you’re looking to change the band on your Fitbit Versa, follow these step-by-step instructions:
And that’s it! You’ve successfully changed the band on your Fitbit Versa. Enjoy your new look and show off your style with your customized smartwatch.
Before you start changing the bands on your Fitbit Versa, make sure you have the following tools and accessories:
Having these tools and accessories ready will make the process of changing the bands on your Fitbit Versa much easier and more efficient.
Changing the band on your Fitbit Versa is a simple process that can be done in just a few easy steps. Follow the guide below to remove the old band:
Once you have successfully removed the old band, you can now proceed to install the new band or replace it with an accessory band of your choice.
Read Also: Incognito on Google Maps: How to improve your online safety
Once you have chosen the new Fitbit Versa band you want to install, follow these steps to replace the old band and install the new one:
It is important to ensure that the new Fitbit Versa band is properly installed and securely attached to the watch body to prevent it from coming loose or falling off during use.
Yes, you can easily change the bands on your Fitbit Versa. The bands are detachable and can be replaced with compatible accessory bands.
No, not all bands are compatible with the Fitbit Versa. The Fitbit Versa uses a specific band design with quick-release pins, so you will need to find bands that are specifically designed for the device. Make sure to check the compatibility before purchasing any replacement bands.
Review: Samsung Galaxy S23 Ultra offers an incredible screen and long-lasting battery life The Samsung Galaxy S23 Ultra has been making waves in the …
Read Article
3 Free Second Phone Number App to Add to Your Android Phone Are you tired of giving out your personal phone number to strangers or businesses? Do you …
Read Article
How to buy bitcoin: a beginner’s guide Bitcoin is the most famous and popular cryptocurrency, which is actively discussed and used all over the world. …
Read Article
4 amazing tips for buying emi without a credit card Buying goods on installments without using a credit card is becoming increasingly popular. This is …
Read Article
The 10 best apps for hiding apps, photo videos. Modern smartphones with their camera capabilities and app features have become our indispensable …
Read Article
“Unfortunately, Gallery has stopped” error keeps popping up on Samsung Galaxy A3 (Troubleshooting Guide) If you own a Samsung Galaxy A3 and have …
Read Article

