How to send emails from different email addresses in outlook?
Outlook is one of the most popular email clients used to send and receive emails. It provides many features, including the ability to send emails from different email addresses. This can be useful if you have multiple mailboxes or if you want to send an email on behalf of another recipient. In this simple guide, we’ll show you how to send emails from different email addresses.
Step 1: Log in to your Outlook account and open the “Settings” section.
Table Of Contents
Step 2: In the “Mail” section, find the “Accounts” tab. Click on it to open the list of available email addresses.
Step 3: Click on the “Add Account” button to add a new email account. Enter the details of the new email address including username and password.
Step 4: After adding a new mailbox, go back to “Settings” and find “Send email on behalf of”. Select your desired email address from the list.
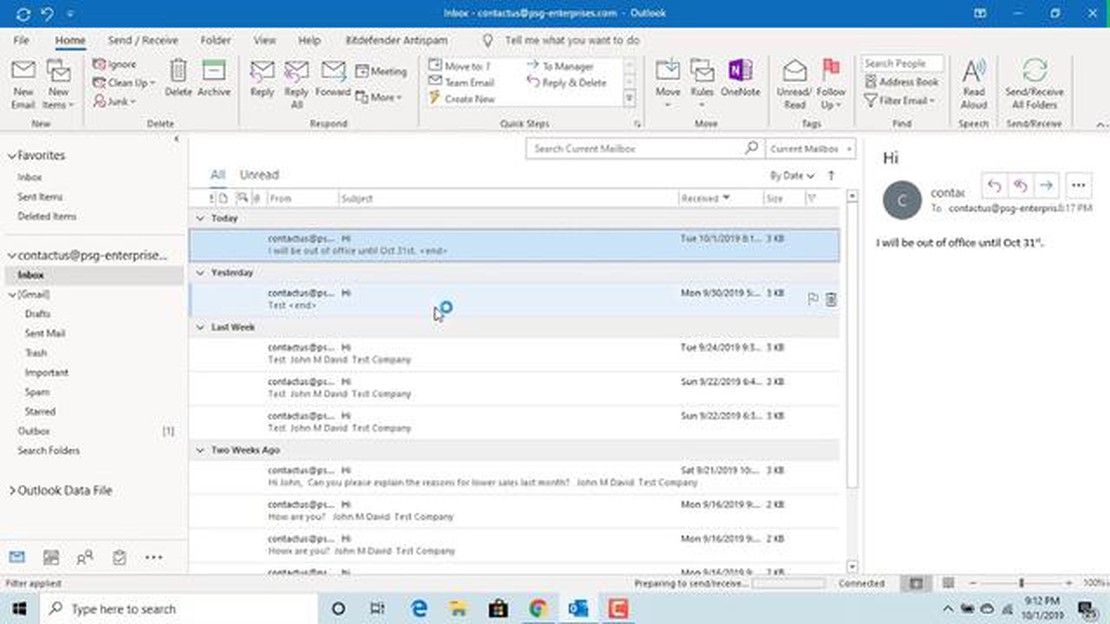
Step 5: Now that you have configured different email addresses to send emails, you can select the desired address each time you send an email. Just open a new email, click on the “From” field and select the address from the list of available addresses.
Now you know how to send emails from different email addresses in Outlook. This feature can be useful for those who own multiple email addresses or need the ability to send emails on behalf of another recipient.
How to send emails from different email addresses in Outlook?
Microsoft Outlook provides the ability to send emails from multiple email addresses, which can be handy for those who use multiple email addresses for different purposes. In this article, I will explain how to configure Outlook to send emails from different email addresses.
1- Open Outlook and click on the File tab in the top left corner.
2. From the drop-down menu, select “Information” and find the “Accounts” section.
3. Click on the “Manage Accounts” button.
4. In the window that opens, select the “Email” tab.
5. Click on the “New” button at the top of the window.
6. Select “Email Account” and click on the “Next” button.
7. Enter your name and email address, and then click the “Next” button.
8. Enter a password for this account and click the “Next” button.
9. Outlook will automatically set up a connection to your e-mail account. Click on the “Done” button.
You have successfully added a new email account in Outlook. You can now send emails from different email addresses by using the “From” function when creating a new email.
To select a mail address to send the email, follow these steps:
Create a new email by clicking the “New Email” button at the top of Outlook.
In the window that opens, find the “From” field at the top and click on it.
From the drop-down list, select the desired email address from the list of available addresses.
Now, when you create and send a new email, it will be sent from the email address you selected. Remember, you can always change the sender address for each email.
Sometimes you may need to update your account information, for example, if you change your password or email server. To make changes, follow these steps:
Go to the Accounts section in Outlook settings.
Select the desired account and click the Edit button.
Make the necessary changes and click on the “Next” button to verify the settings.
Outlook will automatically configure the connection with the changes. Click on the “Done” button.
Now you know how to send emails from different email addresses in Outlook. This is a very handy feature for those who use multiple email addresses for different purposes.
To send emails from different email addresses in Outlook, you need to set up the corresponding email accounts. Follow the instructions below to set up email accounts:
Open Outlook: Launch the Outlook application on your computer.
Go to Account Settings: Click on the “File” button in the upper left corner of the Outlook window and select “Account Settings”.
Add a new account: In the “Account Settings” window that opens, select the “Email” tab and click the “Add Account” button.
Select Account Type: In the window that appears, select the type of email account you want to add. For example, “Microsoft Exchange”, “POP3”, or “IMAP”.
Enter account details: Enter your name, e-mail address and password in the appropriate fields.
Customize server settings: Enter the address of the incoming and outgoing mail server, as well as security and authentication information of your choice.
Complete the installation: Click the Next button and wait for Outlook to verify your account settings. If all the settings are correct, Outlook will successfully add your email account.
Repeat these steps for each email account you want to add to Outlook. When all email accounts are set up, you will be able to choose which address to send emails from when you create a new message in Outlook.
Outlook is one of the most popular email clients that allows you to send and receive emails. In this article, we will look at how to add multiple email addresses in Outlook to send emails from different accounts.
1. Open the account settings
Open the Outlook program and go to the “File” menu. From the drop-down menu, select “Information” and then “Account Settings”.
2. Adding a new account
In the “Accounts Setup” window that opens, click the “Add Account” button. Select the “Email” option and click the “Next” button.
3. Entering account details
Now enter your name and email address in the appropriate fields. Click the “Next” button to continue.
4. Select the type of mail server
Select the type of mail server you are using (for example, Exchange, POP3, or IMAP). Contact your email provider or system administrator if you need assistance with this step.
5. Enter your mail server settings
Enter your mail server information (incoming and outgoing mail server name, user name, and password). If you need help with these settings, contact your email provider or system administrator.
6. Verify settings and finalize
Verify the settings you entered and make sure they are correct. Click the “Next” button to finish adding the new account. Outlook will run a connection test and if everything is configured correctly, you will receive a success notification.
You should now have multiple email addresses added to Outlook, and you can choose which address to send emails from when writing a new message.
If you need to add another email address, just repeat these steps. You can add as many accounts as you need and choose the address you want when sending emails.
Selecting a sender when creating an email
Microsoft Outlook provides the ability to send emails from different email addresses. To do this, you need to add all your email accounts in Outlook and set the desired sender when creating a new email.
To add a mail account in Outlook, follow these steps:
Open the Outlook program.
From the toolbar, select the File tab.
From the menu that opens, select “Account Settings” and click on the “Add Account” button.
Select an account type (for example, “Email”) and enter the account details.
Follow the on-screen instructions to complete the email account setup.
Repeat these steps for each email account you want to add to Outlook.
After all the required email accounts have been added to Outlook, you can select the sender when creating a new email:
Open the Outlook program.
From the toolbar, select the New Message tab.
In the new email window, locate the Sender field and click it.
In the list that opens, select the email account on whose behalf you want to send the message.
Now you can select the right sender each time you create a new email in Outlook. Be careful and choose the right email account depending on the situation and recipient.
What to do if your Samsung Galaxy Note 8 gets stuck on Verizon screen (Troubleshooting Guide) If you own a Samsung Galaxy Note 8 and are experiencing …
Rumbleverse crashes/not loading on xbox Rumbleverse is an ambitious online action game developed by NetEase Games studio that offers players to enter …
How To Change Text Notification Sound on Galaxy S22 Changing text notification sounds on your Galaxy S22 is a great way to personalize your device and …