
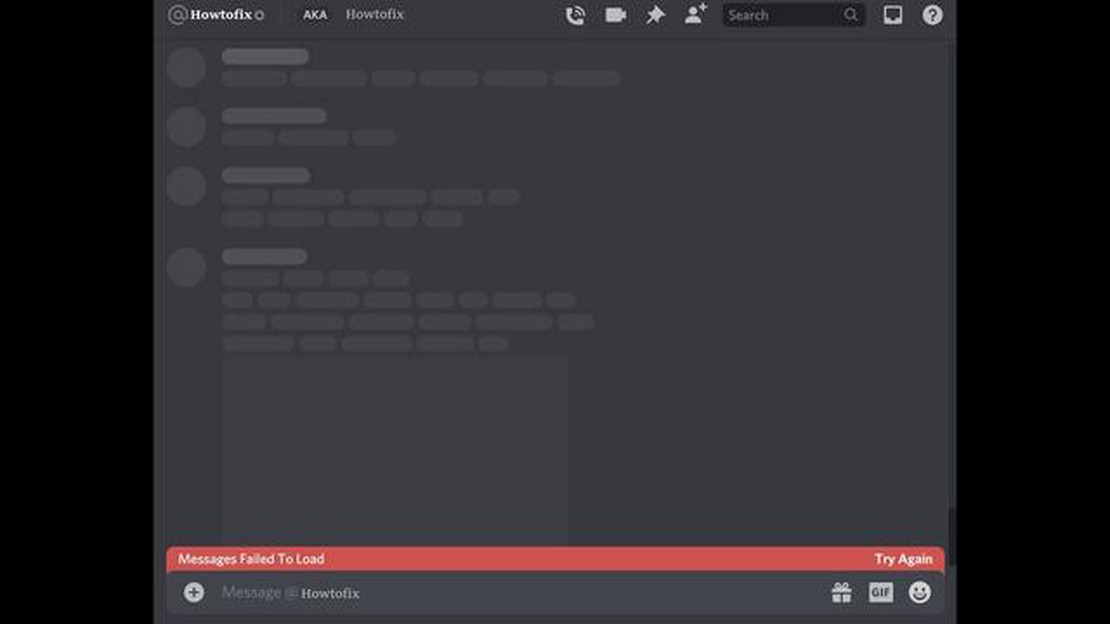

How To Fix Discord Messages Failed To Load Error (Not Working)
A Troubleshooting Guide: Tips for Resolving Discord Messages Failed to Load Error and Restoring Functionality If you are an avid user of Discord, you …
Read Article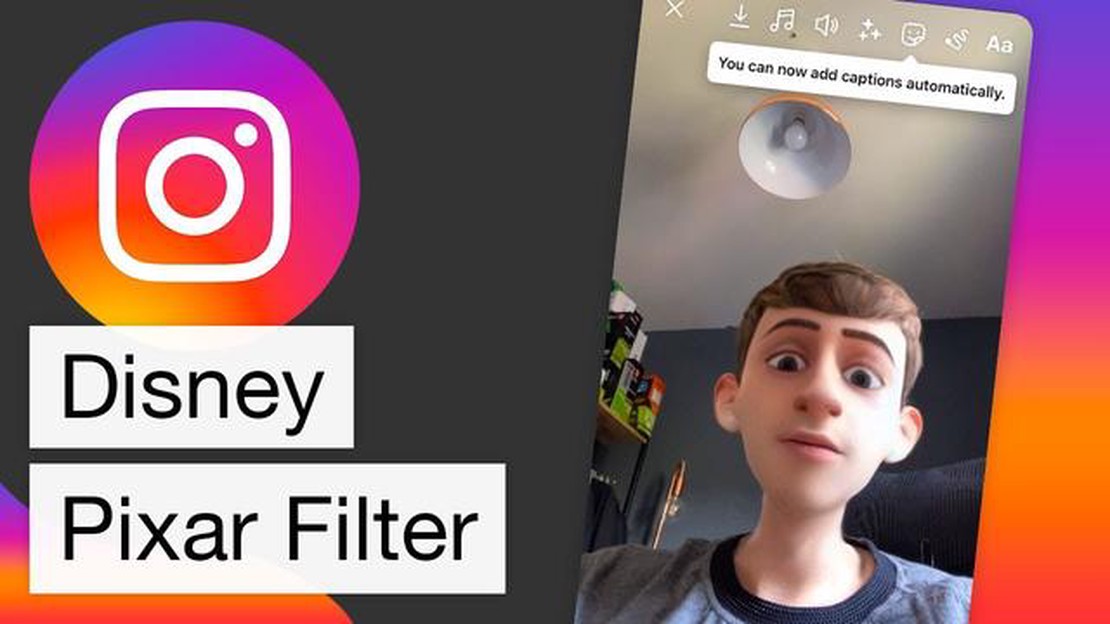
Social media filters have become an indispensable tool for self-expression and creating a unique image of the user. One of the most popular filters has become the Disney Pixar filter, which allows you to add some magic and inspiration from your favorite cartoon characters to your photos.
In this article, we’ll show you how to quickly and easily get the Disney Pixar filter on Instagram and start using it in your posts. All you’ll need is a smartphone with the Instagram app installed and internet access.
Step 1: Open the Instagram app and sign in to your account or sign up if you don’t already have one. Then go to the “Community” tab and look for the @pixar account.
Step 2: Sign up for the @pixar account to access the Disney Pixar filter. Note that this filter is only available to account subscribers. Once subscribed, go to the “Effects” tab and find the Disney Pixar filter under “Popular”.
Step 3: To use the filter, click on the filter name and click “Apply”. The filter will be applied to your photo and you can customize it to your liking by adjusting the saturation and brightness. When you’re done editing, click “Save” and your photo with the applied filter will appear in your Instagram feed.
Instagram offers its users a huge variety of filters that help them create beautiful and unique photos. One of the most popular filters is the Disney Pixar filter, which adds elements from the famous Disney studio cartoons to the photo.
To get the Disney Pixar filter on Instagram, follow these simple steps:
After selecting the Disney Pixar filter, you will be able to preview how your image will look with this filter. If you like the result, click the “Apply” button in the top right corner of the screen.
You can now caption your photo, add a description, and post it to your Instagram page using the Disney Pixar filter.
Note that the Disney Pixar filter is only available to Instagram users and can only be set on photos within the app. It is not available for use in other apps or websites.
Before you start using the Disney Pixar filter on Instagram, make sure your app is updated to the latest version. Usually, app updates contain bug fixes, performance improvements, and new features.
To check for an Instagram update on your Android device, follow these steps:
Read Also: How To Fix Apex Legends Crashing In Xbox Series X - Complete Guide
For iPhone and iPad users, the procedure for updating the Instagram app looks a little different:
Once the Instagram app has been successfully updated, the Disney Pixar filter should become available to you. If the filter still doesn’t appear, try restarting the app or your device, and make sure you have enough free space on your device to install the update.
If you want the Disney Pixar filter on Instagram, you should look for the “Effects” section in the Instagram app.
To find this section:
Read Also: Jpg to pdf windows 10: convert now! no app required!
In the Effects section, you’ll find a variety of filters that you can apply to your photos and videos. To find a Disney Pixar filter, you can use the search or simply scroll through the available effects.
If a Disney Pixar filter becomes available after it appears, you can find it in the Effects section and apply it to your photos or videos.
Now you have all the steps you need to find the Disney Pixar filter in the Instagram app!
To install the Disney Pixar filter in Instagram and enjoy it, follow these simple steps:
Now you’re ready to use the Disney Pixar filter on Instagram and share your unique photos and videos with your friends and followers!
To get the Disney Pixar filter on Instagram, you need to open the Instagram app, go to the “Effects” section, find the “Disney Pixar” filter and click on the “Apply” button.
To find the Disney Pixar filter on Instagram, open the Instagram app, go to “Effects” and use the search function. Type the name of the Disney Pixar filter into the search box and it will be found.
Yes, you can get a Disney Pixar filter on Instagram for free. Simply open the Instagram app, find the “Effects” section, use the search to find the Disney Pixar filter and apply it to your photos.
To get the Disney Pixar filter on Instagram, you need to open the Instagram app, go to the “Effects” section and use the search function to find the Disney Pixar filter. Then click on the “Apply” button to apply the filter to your photos.
The Disney Pixar filter in Instagram can be found in the “Effects” section. Open the Instagram app, go to this section and use the search to find the Disney Pixar filter. You will then be able to apply the filter to your photos.
To get a Disney Pixar filter on Instagram, you need to download and install the Instagram app on your cell phone. After that, open the app, tap on the camera icon at the bottom of the screen and select the “Smileys” tab. In the search box, type “Disney Pixar” and select the filter you like. Click on the “Try” button and apply the filter to your photo or video.
A Troubleshooting Guide: Tips for Resolving Discord Messages Failed to Load Error and Restoring Functionality If you are an avid user of Discord, you …
Read Article
How To Fix PS4 Spotify Not Working in 2023 (NEW & Updated) Are you a PlayStation 4 owner who enjoys listening to music while gaming? If so, you may …
Read Article
Galaxy S6 app won’t play music in the background, screen overlay detected error, other app issues Are you encountering issues with apps on your Galaxy …
Read Article
New to credit scores? Here’s the gist of it Credit scores are a modern tool used by lending institutions to assess a borrower’s creditworthiness. This …
Read Article
How To Fix It When Apps Keep Crashing On Google Pixel 7 If you own a Google Pixel 7 and are experiencing issues with apps constantly crashing, you’re …
Read Article
How To Fix Vizio TV Keeps Turning Off Issue Is your Vizio TV constantly turning off on its own? This can be a frustrating problem to deal with, …
Read Article


