How to boot your Samsung Galaxy J5 in Safe mode, Recovery mode and wipe cache partition, do resets (Tutorials)
In this step-by-step guide, we will walk you through the process of booting your Samsung Galaxy J5 into different modes, such as Safe Mode and Recovery Mode, as well as how to wipe the cache partition and perform resets on your device.
If you are experiencing issues with your Galaxy J5, such as frequent app crashes, freezing, or slow performance, booting your device into Safe Mode can help you identify whether an app is causing the problem. Safe Mode allows you to run your device with only the pre-installed apps, disabling any third-party apps that may be causing conflicts.
Table Of Contents
Recovery Mode, on the other hand, is a separate bootable partition on your device that allows you to perform various system-level operations, such as performing a factory reset or clearing the cache partition. These actions can help resolve more serious issues, such as system crashes or boot loops.
Finally, we will guide you through the process of wiping the cache partition on your Galaxy J5. The cache partition stores temporary files and data that can sometimes cause performance issues or conflicts. Wiping the cache partition can help improve the overall performance and stability of your device.
Whether you are troubleshooting issues or performing routine maintenance on your Samsung Galaxy J5, this step-by-step guide will provide you with the necessary instructions to navigate through different modes and perform essential operations on your device.
Keep in mind that performing a factory reset or wiping the cache partition will erase all data on your device, so be sure to back up any important files before proceeding. Additionally, the exact steps may vary slightly depending on the model and firmware version of your Galaxy J5, so it’s always a good idea to consult the official documentation or contact Samsung support for specific instructions.
Step-by-Step Guide: Boot Your Samsung Galaxy J5 in Safe Mode
The Safe Mode on your Samsung Galaxy J5 is a useful troubleshooting feature that allows you to start the device with only the essential apps and services running. This can be helpful if you are experiencing issues with your device, such as freezes, crashes, or excessive battery drain.
To boot your Samsung Galaxy J5 in Safe Mode, follow these steps:
Press and hold the Power button until the Power menu appears on the screen.
Tap and hold the Power Off option until the Safe Mode option appears.
Tap on the Safe Mode option to start your device in Safe Mode.
Once your device is in Safe Mode, the words “Safe Mode” will be displayed in the bottom left corner of the screen. In Safe Mode, only the default apps and services will be running, and any third-party apps you have installed will be temporarily disabled.
If the issues you were experiencing are no longer present in Safe Mode, it is likely that one of the third-party apps you have installed is causing the problem. To identify the culprit, you can uninstall apps one by one until the issue is resolved. If the problem persists even in Safe Mode, it may be necessary to consider other troubleshooting options or contact Samsung support for assistance.
Step-by-Step Guide: Boot Your Samsung Galaxy J5 in Recovery Mode
Recovery mode is a powerful tool on your Samsung Galaxy J5 that allows you to perform various tasks such as wiping cache partition, performing a factory reset, and installing system updates. Here’s a step-by-step guide on how to boot your Samsung Galaxy J5 into recovery mode.
Turn off your Samsung Galaxy J5 by pressing and holding the power button.
Once the device is completely turned off, press and hold the volume up, home, and power buttons simultaneously.
Continue holding the buttons until the Samsung logo appears on the screen, then release all the buttons.
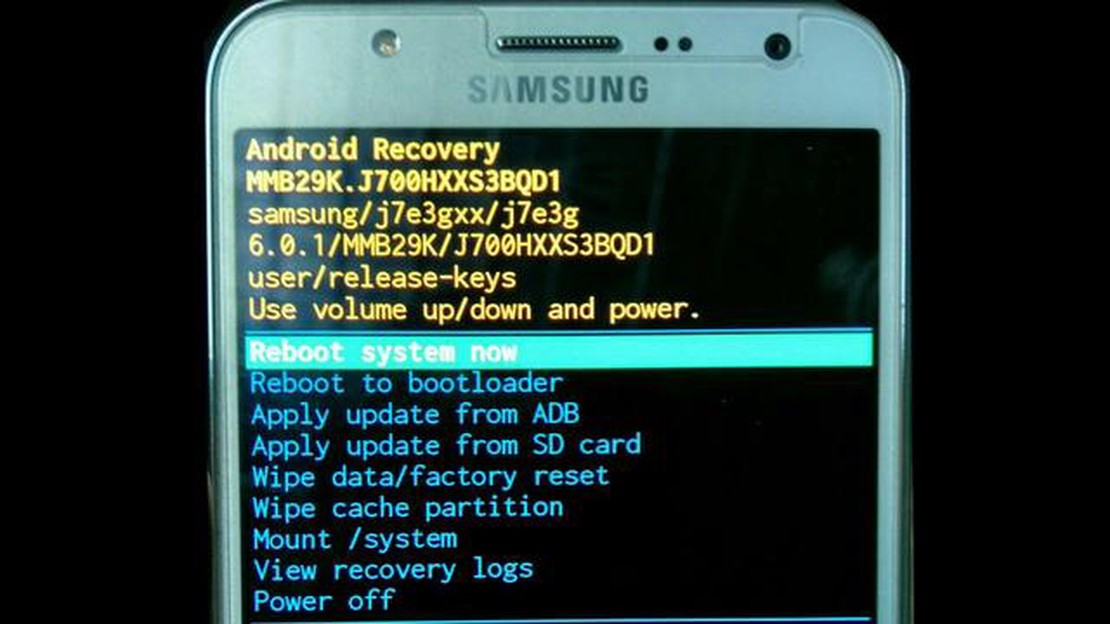
You will now see the Android system recovery menu.
Use the volume down button to scroll down and highlight the desired option.
Press the power button to select the highlighted option.
Common Options in Recovery Mode:
Reboot system now: This option allows you to restart your device normally.
Apply update from ADB: This option is used to apply system updates that were downloaded to your computer and transferred to your device via ADB (Android Debug Bridge).
Wipe data/factory reset: This option will erase all data on your device and restore it to its factory settings.
Wipe cache partition: This option will clear the cache partition of your device. It is useful when you are experiencing issues with your system or apps.
Apply update from SD card: This option allows you to apply system updates that are stored on an external SD card.
Reboot to bootloader: This option will reboot your device into the bootloader mode, which allows you to perform advanced tasks such as flashing custom recovery or rooting your device.
Power off: This option will turn off your device.
That’s it! You have successfully booted your Samsung Galaxy J5 into recovery mode. Use the volume up and down buttons to navigate through the menu, and the power button to select an option. Remember to be cautious when using the options in recovery mode, as they can affect the normal operation of your device.
Step-by-Step Guide: Wipe Cache Partition and Perform Resets on your Samsung Galaxy J5
If you’re experiencing issues with your Samsung Galaxy J5, such as lagging or freezing, it may be helpful to wipe the cache partition or perform a reset. In this step-by-step guide, we’ll walk you through the process of wiping the cache partition and performing resets on your device.
Wipe Cache Partition:
Turn off your Samsung Galaxy J5.
Press and hold the Volume Up, Home, and Power buttons simultaneously.
Release the buttons when the Samsung logo appears.
Use the Volume Down button to navigate to the “Wipe Cache Partition” option.
Press the Power button to select the option.
Use the Volume Down button to highlight “Yes” and press the Power button to confirm.
Wait for the cache partition to be wiped.
Once the process is complete, use the Volume Down button to select “Reboot System Now” and press the Power button to restart your device.
Perform Resets:
Soft Reset:
Press and hold the Power button until the menu appears.
Select “Power Off” and wait for the device to power off.
Press and hold the Power button to turn on your device.
Factory Reset:
Backup all your important data as a factory reset will erase everything on your device.
Go to the Settings menu on your Samsung Galaxy J5.
Scroll down and tap on “Backup and Reset”.
Tap on “Factory Data Reset”.
Review the information, then tap on “Reset Device”.
Enter your PIN or password if prompted.
Tap on “Delete All” to confirm the reset.
Your device will restart and perform the factory reset process.
Note: Performing a factory reset will erase all data on your device, so make sure to backup any important information beforehand.
By following these step-by-step instructions, you should be able to successfully wipe the cache partition and perform resets on your Samsung Galaxy J5. This can help resolve various issues and improve the performance of your device.
FAQ:
What is the purpose of safe mode on the Samsung Galaxy J5?
Safe mode on the Samsung Galaxy J5 allows you to troubleshoot issues by running your device with only the pre-installed software. It disables any third-party applications you have installed, making it easier to determine if one of these apps is causing a problem. It’s a useful tool for diagnosing and fixing issues on your device.
Incognito mode on google maps will make you safer online In today’s world, internet security is becoming an increasingly hot topic. Every day millions …
Move files from Samsung to Mac | How to transfer files from Samsung Galaxy S10 to MAC 2019 Transferring files from your Samsung Galaxy S10 to your Mac …
How To Set Up Voicemail On Galaxy S9 The Samsung Galaxy S9 is a versatile smartphone that offers a range of features, including the ability to set up …