


Discover Who Unfollowed Me On Instagram: Easy Steps to Find Out
Who Unfollowed Me On Instagram? Here’s How To Find Out Instagram is a popular social media platform that allows users to share photos and videos with …
Read Article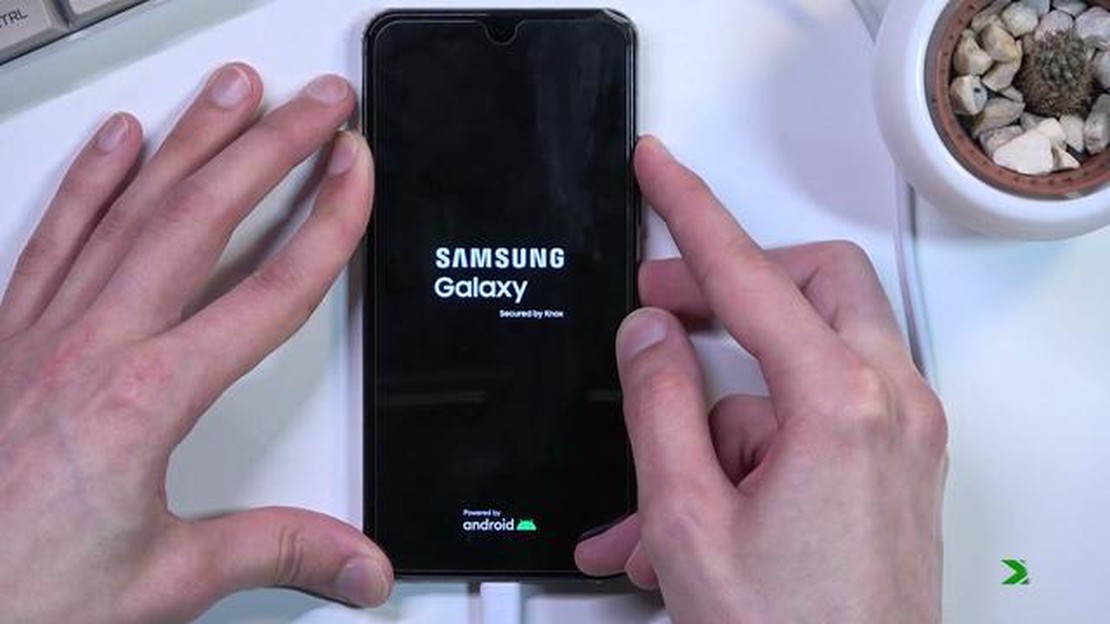
If you’re experiencing issues with your Samsung Galaxy S22, such as slow performance or app crashes, clearing the cache partition can often help resolve these problems. The cache partition stores temporary data and files that can accumulate over time and impact the device’s performance. In this step-by-step guide, we’ll walk you through the process of clearing the cache partition on your Galaxy S22.
Step 1: Power off your Galaxy S22
Before proceeding, ensure that your device is powered off completely. Press and hold the power button until the power off menu appears, then select “Power off”.
Step 2: Enter Recovery Mode
To clear the cache partition, you’ll need to access the recovery mode on your Galaxy S22. Press and hold the volume up button and the power button simultaneously until the Samsung logo appears. Release both buttons, and you’ll be greeted with the recovery mode menu.
Step 3: Navigate to Wipe Cache Partition
Use the volume buttons to navigate through the options in the recovery mode menu. Look for the option labeled “Wipe cache partition” and select it using the power button.
Step 4: Confirm the Action
Once you’ve selected “Wipe cache partition”, a confirmation prompt will appear. Use the volume buttons to highlight “Yes” and press the power button to confirm the action.
Step 5: Wait for the Process to Complete
The cache partition will now be cleared. This process may take a few minutes, so be patient and avoid interrupting it. Once the process is complete, you’ll be taken back to the recovery mode menu.
Step 6: Reboot Your Galaxy S22
Use the volume buttons to navigate to the option labeled “Reboot system now” and select it using the power button. Your Galaxy S22 will now reboot, and the cache partition will be cleared.
By clearing the cache partition on your Galaxy S22, you can improve its performance and resolve any issues caused by accumulated cache files. Remember to only clear the cache partition and not the entire device, as this will not delete your personal data or apps. If you’re still experiencing issues after clearing the cache partition, you may need to consider other troubleshooting steps or seek assistance from Samsung’s support team.
Image Source: TheDroidGuy
Is your Galaxy S22 starting to feel sluggish or encounters frequent crashes? Clearing the cache partition can often help resolve these issues. Follow this step-by-step guide to learn how to clear the cache partition on your Galaxy S22.
Clearing the cache partition will not delete any personal data or settings on your Galaxy S22. It only clears temporary files and cached data, so you don’t have to worry about losing any important information.
Press and hold the power button on your Galaxy S22 until the power menu appears. Then, select the “Power off” option to turn off your device.
Press and hold the volume up button and the power button simultaneously until the Samsung logo appears. Once the logo appears, release the power button, but continue holding the volume up button until you see the Recovery Mode screen.
On the next screen, use the volume down button to highlight the “Yes” option, and then press the power button to confirm the cache partition wipe.
Your Galaxy S22 will now begin clearing the cache partition. This process may take a few minutes to complete.
Once the cache partition has been cleared, the “Reboot system now” option will be highlighted. Use the power button to select this option and reboot your Galaxy S22.
After your device has rebooted, test it to see if the performance issues or crashes have been resolved. Clearing the cache partition often helps improve device responsiveness and stability.
Congratulations! You have successfully learned how to clear the cache partition on your Galaxy S22. If you continue to experience performance issues, you may consider performing a factory reset as a last resort.
Read Also: 10 best DSLR photo apps for Android and iOS: a selection of the best tools for creating professional selfies and photos
If you’re experiencing issues with your Galaxy S22, clearing the cache partition can often help solve software-related problems. Follow this step-by-step guide to learn how to clear the cache partition on your Samsung device.
To begin, turn off your Galaxy S22 by pressing and holding the power button. Then, tap on the “Power off” option when it appears on the screen.
Use the volume up and volume down buttons to navigate through the options in the recovery mode menu. Use the power button to select an option.
A confirmation message will appear on the screen. Scroll down to the “Yes” option and select it using the power button to confirm the cache partition wipe.
Read Also: How to clear cache on PS4 and speed up system performance
The cache partition wipe process may take a few minutes. Allow the device to complete the process without interruption.
Your Galaxy S22 will now reboot and the cache partition will be cleared. This process can help resolve various software issues and improve the overall performance of your device.
A cache partition on a mobile device, such as the Samsung Galaxy S22, is a reserved storage area that stores temporary files and data generated by various applications and system processes. It is used to improve the performance and efficiency of the device by storing frequently accessed files and data in a location that can be quickly accessed.
The cache partition stores files such as app data, system settings, application preferences, and other temporary files. These files are automatically generated and stored when using apps or performing system operations.
The cache partition is different from the device’s internal storage or external SD card storage. It is a separate logical storage area that is dedicated to storing cache files and does not affect regular data storage.
Over time, the cache partition may accumulate unnecessary files, junk data, or corrupted files. This can lead to performance issues, app crashes, or other software glitches. Clearing the cache partition can help resolve these issues by removing the unnecessary files and data.
Clearing the cache partition on a Galaxy S22 can be done through the device’s recovery mode. This process does not delete any personal data or settings and only clears the temporary files stored in the cache partition.
| Benefits of Clearing Cache Partition: |
|---|
| * Improves device performance by removing unnecessary files |
It is recommended to clear the cache partition on a Galaxy S22 periodically or when experiencing performance issues. This simple troubleshooting step can help optimize the device’s performance and resolve software-related problems.
Clearing the cache partition on your Galaxy S22 can have several benefits. Here are a few reasons why you should consider clearing the cache partition on your device:
It is important to note that clearing the cache partition will not delete any personal data or settings on your Galaxy S22. However, it is always a good idea to back up any important data before performing any system maintenance tasks.
Clearing the cache partition on your Samsung Galaxy S22 can help to resolve various issues such as slow performance, app crashes, or system glitches. The cache partition stores temporary files and data that can accumulate over time and affect the device’s performance. Clearing the cache partition can help to free up space and improve the overall performance of your Galaxy S22.
Note: Clearing the cache partition will not delete any personal data or settings on your device. However, it is always a good idea to back up important data before performing any system maintenance.
Here’s a step-by-step guide on how to clear the cache partition on your Galaxy S22:
After your Galaxy S22 restarts, the cache partition will be cleared, and you should notice an improvement in the device’s performance. If you continue to experience issues, you may consider performing a factory reset as a last resort.
Note: Performing a factory reset will erase all data and settings on your device, so it is crucial to backup important data before proceeding with this step.
Overall, clearing the cache partition on your Galaxy S22 is a useful troubleshooting step to help improve performance and resolve common system issues. It is recommended to clear the cache partition periodically to maintain the optimal performance of your device.
Clearing the cache partition can help improve the performance of your Galaxy S22 by removing temporary files and data that may be causing issues or slowing down the device.
To clear the cache partition on your Galaxy S22, you need to first power off the device. Then, press and hold the volume up button and the power button simultaneously until the Samsung logo appears. Release the power button but continue holding the volume up button until the Android Recovery menu appears. Use the volume down button to navigate to the “Wipe cache partition” option and press the power button to select it. Finally, use the volume down button to highlight “Yes” and press the power button to confirm.
No, clearing the cache partition will not delete any of your personal data. It only removes temporary files and data that are not critical to the functioning of your device.
There is no set frequency for clearing the cache partition on your Galaxy S22. However, if you notice any performance issues or your device starts running slower, it may be a good idea to clear the cache partition to see if it improves the overall performance.
In addition to clearing the cache partition, you can also try uninstalling unnecessary apps, limiting the number of widgets on your home screen, disabling animations, and regularly updating your device’s software to improve its performance.
Who Unfollowed Me On Instagram? Here’s How To Find Out Instagram is a popular social media platform that allows users to share photos and videos with …
Read Article
5 Best Android Messaging Apps in 2023 In today’s fast-paced digital age, staying connected with friends and family has never been easier. With …
Read Article
10 (really free) vpn for torrents and p2p. These days, using a virtual private network (VPN) has become an integral part of security and privacy in …
Read Article
Apps like tinder 10 best alternative dating app to tinder. Dating apps have become incredibly popular these days. However, not everyone likes Tinder …
Read Article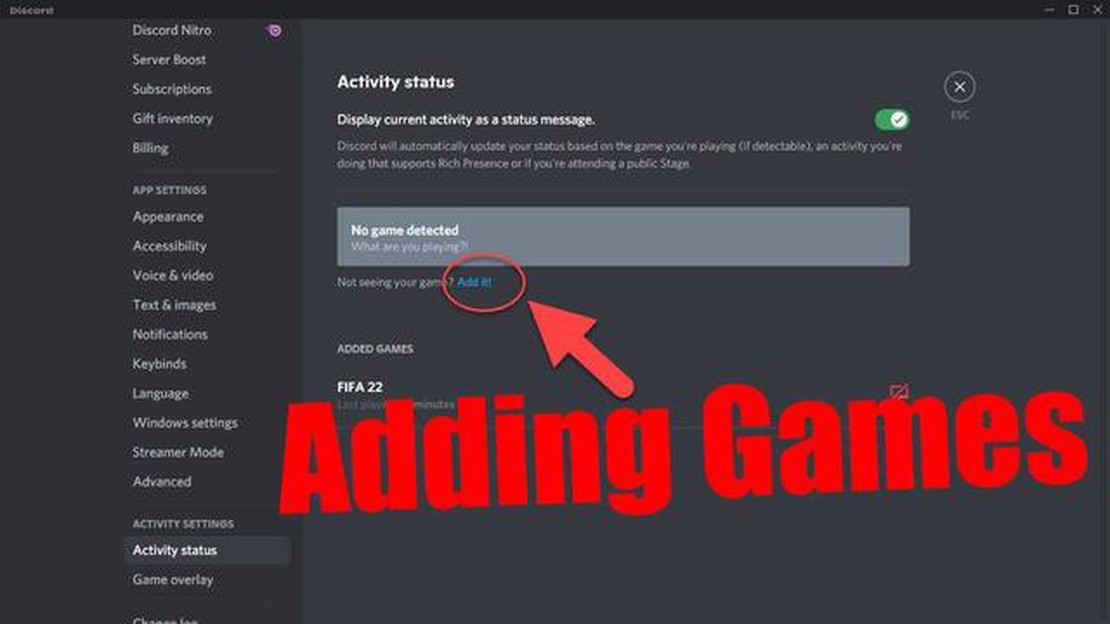
Easy Steps On How To Add Games To Discord | NEW in 2023! Discord has become one of the most popular platforms for gamers to connect and communicate …
Read Article
Modern warfare 2 error ce-108255-1 crash ps5 (beta) Modern Warfare 2 is one of the most popular and anticipated games of this year, but unfortunately …
Read Article


