


Metaverse and online gaming: revolutionizing the internet!
How metaverse and online gaming will revolutionize the internet The metaverse is a new stage in the development of the web, which is a digital …
Read Article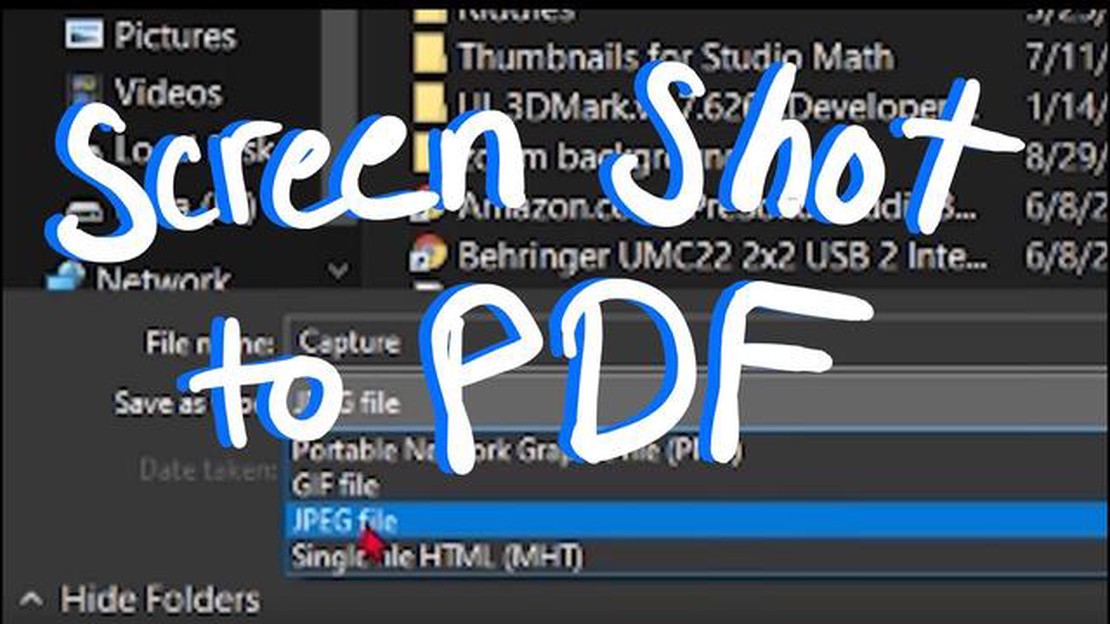
Being able to save a screenshot as a PDF can be incredibly useful, whether you want to share a document with someone or simply want to preserve a webpage for future reference. Fortunately, saving a screenshot as a PDF in Windows is a relatively straightforward process that can be accomplished in just a few simple steps. In this step-by-step guide, we will walk you through the process of saving a screenshot as a PDF in Windows, allowing you to easily share and store your screenshots in a more versatile and universally compatible format.
To get started, you will first need to take a screenshot of the desired content that you want to save as a PDF. This can be done by pressing the “Print Screen” button on your keyboard, or by using the “Snipping Tool” or “Snip & Sketch” application if you are using Windows 10. Once you have captured the screenshot, it is time to convert it into a PDF file.
To convert your screenshot into a PDF, you will need a software or online tool that can perform this conversion. There are many options available, both free and paid, but one of the most popular and reliable tools is Adobe Acrobat. Adobe Acrobat allows you to easily convert various file types, including screenshots, into PDFs with just a few clicks. To use Adobe Acrobat, simply open the program and click on the “Create PDF” option. Then, select the screenshot file that you want to convert and choose the destination folder where you want to save the PDF.
If you prefer to use an online tool, there are several websites that offer screenshot to PDF conversion services. One such website is Smallpdf. Smallpdf provides a simple and user-friendly interface that allows you to upload your screenshot and convert it into a PDF format in a matter of seconds. Simply visit the Smallpdf website, select the “JPG to PDF” option, upload your screenshot, and click on the “Convert to PDF” button. Once the conversion is complete, you can download the PDF file and save it to your computer.
In conclusion, saving a screenshot as a PDF in Windows is a simple process that can be accomplished using various software and online tools. Whether you choose to use Adobe Acrobat or an online conversion service like Smallpdf, the result is the same – a high-quality PDF file that can be easily shared and stored. By following the step-by-step guide outlined in this article, you can quickly and easily save your screenshots as PDFs, making them more versatile and universally compatible.
Taking a screenshot is a handy way to capture important information or share a visual representation of something on your computer screen. While saving a screenshot as an image file like PNG or JPEG is common, saving it as a PDF offers some unique advantages. PDF files are easy to share and preserve the original formatting and quality of the image. In this article, we will explore the best methods to save a screenshot as a PDF in Windows.
By following these methods, you can easily save a screenshot as a PDF in Windows. Choose the method that suits your needs and preferences to efficiently capture and save screenshots in PDF format.
The Built-in Snipping Tool is a useful tool available in Windows that allows you to capture a screenshot and save it as a PDF file. Here are the steps to use this tool:
Read Also: Install ios apps without jailbreaking in the app store
Once you have followed these steps, you will have successfully saved a screenshot as a PDF file using the built-in Snipping Tool in Windows.
An alternative way to save a screenshot as a PDF in Windows is by using the Print to PDF feature. This method allows you to convert any file or document, including screenshots, into a PDF format.
Here’s how you can use the Print to PDF feature:
By following these steps, you can easily convert a screenshot into a PDF using the Print to PDF feature in Windows. This method allows you to customize the PDF settings, such as page orientation, paper size, and more, before saving the file.
Read Also: Easy Steps to Troubleshoot and Fix PS5 Disney+ Not Working Issue (Updated 2023)
If you prefer using third-party software to save a screenshot as a PDF in Windows, there are several options available. These software programs offer additional features and flexibility compared to the built-in screenshot tools. Here is a step-by-step guide on how to use third-party software to take a screenshot and convert it to a PDF:
Using third-party software to take a screenshot and convert it to a PDF offers more control and options compared to the built-in Windows tools. You can choose from a variety of screenshot tools available online and find the one that best meets your requirements.
If you have Microsoft Word installed on your Windows computer, you can use it to save a screenshot as a PDF file. Here’s how:
That’s it! You have successfully saved a screenshot as a PDF file using Microsoft Word on your Windows computer.
Note that this method requires you to have Microsoft Word installed on your computer. If you don’t have Word, you can try one of the other methods mentioned in this article.
Yes, you can save a screenshot as a PDF in Windows using a few simple steps.
Saving a screenshot as a PDF allows you to easily share it without losing any image quality or formatting.
To save a screenshot as a PDF on Windows, press the “Print Screen” button on your keyboard to capture the screenshot. Then, open a PDF editing program or a web browser that supports saving as PDF, paste the screenshot into the program, and save it as a PDF file.
If you don’t have a PDF editing program, you can use a web browser that supports saving as PDF, such as Google Chrome. Simply paste the screenshot into a new tab in Chrome, right-click on the image, and select the option to save it as a PDF.
Yes, another way to save a screenshot as a PDF on Windows is to use a screenshot tool or a PDF printer. These programs allow you to capture the screenshot and save it directly as a PDF file without the need for any additional steps.
How metaverse and online gaming will revolutionize the internet The metaverse is a new stage in the development of the web, which is a digital …
Read Article
How To Fix Sonos Roam Bluetooth Not Connecting Problem The Sonos Roam is a portable smart speaker that offers high-quality audio and a seamless …
Read Article
Downloading and updating gaomon drivers in windows 11, 10, 8 and 7 Drivers are an important part of your Gaomon device software. They ensure that your …
Read Article
The ultimate guide to winning solo matches in pubg. PlayerUnknown’s Battlegrounds (PUBG) is a popular battle royale game in which players fight on a …
Read Article
7 best screen recording apps for windows 11 Recording your computer screen can be useful for various tasks, be it creating training videos, streaming …
Read Article
How To Samsung Galaxy J7 Not Getting Software Updates If you own a Samsung Galaxy J7 and have noticed that you are not receiving software updates, you …
Read Article


