


Top 5 Flashlight Apps for Android in 2023 - Find the Best One for Your Device!
5 Best Flashlight App For Android in 2023 In today’s fast-paced and technologically advanced world, having a reliable flashlight app on your Android …
Read Article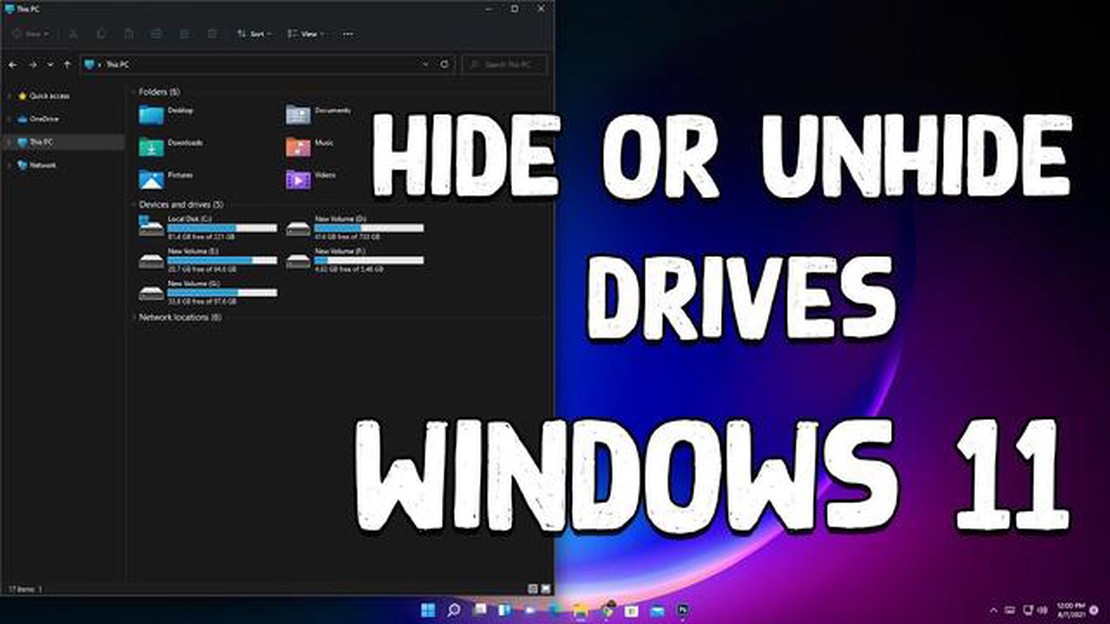
Many changes and improvements have been made in the new Windows 11 operating system. One of the new features is the ability to hide a disk to protect your data from prying eyes. In this article, we will tell you how to hide disk in Windows 11 quickly and easily.
Step 1: Go to “Control Panel.” To do so, right-click on the Start icon at the bottom left corner of the screen and select “Control Panel” from the context menu.
Step 2: In “Control Panel”, find the “Administration” section and click on it. Then select “Computer Management.”
Step 3: In the “Computer Management” window, find the “Disk Devices” section and expand it. Then select “Disk Management.”
Step 4: In the list of disks, find the disk you want to hide and right-click on it. From the context menu, select “Properties”.
Step 5: In the “Disk Properties” window, select the “Sharing” tab, then check the “Do not show this disk” checkbox. Click “OK” to save the changes.
The selected disk will now be hidden and will not appear in Explorer or elsewhere in the operating system. To display this disk again, repeat the above steps and uncheck “Do not display this disk”.
Windows 11 offers a convenient way to hide a disk to improve data security. In this guide, we will show you how to hide disk in Windows 11 operating system.
Step 1: Launch Windows 11’s “Disk Manager”. To do this, right-click on the Start button and select “Disk Manager” from the list of applications.
Step 2: In the “Disk Manager” window, locate the disk you want to hide. Right click on it and select “Properties” from the context menu.
Step 3: In the “Properties” window of the disk, click on the “Required” tab. Then check the box next to the “Hide this disk” option. Click the “Apply” button and then “OK”.
Step 4: After applying the changes, the drive will be hidden and will not appear in Windows 11 Explorer and other applications.
You can repeat these steps for any disk you want to hide. To display the hidden disk again, repeat the first three steps and uncheck the box next to “Hide this disk”.
Note that hiding a disk is not a defense against data access. If someone has physical access to your computer, they will still be able to access hidden disks. Hidden disks can only be useful for hiding them from prying eyes on a public computer or to prevent users of the system from accidentally accessing them.
Now you know how to hide a disk in Windows 11 and display it again when needed. Have fun using the Windows 11 operating system!
Hiding a disk in Windows 11 can be useful to protect important data or keep personal information safe. By following these instructions, you can quickly and easily hide a disk using screenshots.
Step 1: Click the Start icon in the lower left corner of the screen.
Step 2: Select “Settings” from the menu that appears.
Read Also: How to become a Fortnite pro for chapter two and beyond: tips and strategies
Step 3: In the “Settings” window, locate and select “System”.
Step 4: On the left side of the “System” window, select “Storage”.
Step 5: On the right side of the “Storage” window, locate and select “Disks”.
Step 6: In the list of disks, find the one you want to hide and right click on it.
Step 7: From the context menu, select “Properties”.
Step 8: In the “Disk Properties” window that opens, click the “General” tab.
Read Also: Can't figure out what to play on Xbox One? Press the shuffle button!
Step 9: In the “Attributes” section, find the “Hidden” option and check the box next to it.
Step 10: Click the “OK” button to save your changes.
Step 11: A window will appear warning you to restart your computer. Click the “Yes” button to restart your computer and apply the disk hiding settings.
Congratulations, you have successfully hidden the disk using screenshots! Now the selected disk will not appear in Explorer or applications.
To display the hidden disk again, repeat the above steps and uncheck the “Hidden” option.
Hiding a disk in Windows 11 can be useful if you want to keep your data private or simply hide unnecessary partitions from the eyes of unauthorized users. There are several ways to hide a disk in Windows 11, and in this tutorial we will tell you the easiest ones.
“Disk Manager” will display all available disks and partitions on your computer. Locate and select the disk you want to hide.
When you confirm hiding a disk, the Windows 11 system may warn you that access to the data on that disk may be restricted unless you are the administrator of the computer. Answer “Yes” or “Continue” to proceed with the disk hiding process.
The selected disk will then be hidden from view in Explorer and other file managers. It will remain accessible only through the “Disk Manager”.
If you want to show the hidden disk again, repeat the above steps, uncheck the “Hidden” checkbox in the “Properties” tab and click “Apply”.
To hide a disk in Windows 11, you need to open the “Explorer” window by clicking on the corresponding icon in the taskbar or by pressing the Win + E key. Then you need to select the disk you want to hide by clicking on its name. Next, you need to right-click on the selected disk and select “Properties” in the context menu. In the “Properties” dialog box, you need to go to the “General” tab and check the “Hidden” checkbox. Click “Apply” and “OK” to save the changes. After that, the selected disk will be hidden in Explorer.
In order to return the hidden disk in Windows 11, you need to open the “Explorer” window by clicking on the corresponding icon in the taskbar or by pressing the Win + E key. Then you need to select the “View” item in the top menu of Explorer and choose “Preferences”. In the “Options” dialog box, you should go to the “View” tab and uncheck the “Hidden items” box. After that, the hidden disks will become visible in Explorer.
To hide only certain disks in Windows 11, you need to open the “Explorer” window by clicking on the corresponding icon in the taskbar or by pressing the Win + E key. Then you need to select the disk you want to hide by clicking on its name. Next, you need to right-click on the selected disk and select “Properties” in the context menu. In the “Properties” dialog box, you need to go to the “General” tab and check the “Hidden” checkbox. Click “Apply” and “OK” to save the changes. After that the selected disk will be hidden in Explorer.
Yes, you can hide the system disk in Windows 11, but it is not recommended as it can cause problems with the operating system. To hide the system disk, you need to follow the same steps described in the instructions for hiding disks. However, you should carefully evaluate the consequences of this action before hiding the system disk.
To hide a disk in Windows 11, you need to open Explorer and right-click on the disk you want to hide. Then select the “Properties” option and in the window that opens, check the “Hidden” checkbox. After that, click “OK” and the disk will be hidden.
Yes, there is another way to hide a disk in Windows 11. Open a command prompt by typing “cmd” in the search box and run it as administrator. Then type the command “mountvol drive letter /D”, where “drive letter” is the letter of the drive you want to hide. After running the command, the disk will be hidden.
5 Best Flashlight App For Android in 2023 In today’s fast-paced and technologically advanced world, having a reliable flashlight app on your Android …
Read Article
Dragon age 4: everything you need to know about biowares’ next game Dragon Age 4 is a highly anticipated role-playing game being developed by Bioware …
Read Article
How To Fix Samsung Galaxy Note 9 Text Message Notification Does Not Go Away The Samsung Galaxy Note 9 is a powerful and feature-packed smartphone, but …
Read Article
Find your doppelganger: 9 best tools to find your doppelganger Since the advent of photo IDs on social media and messaging apps, finding your …
Read Article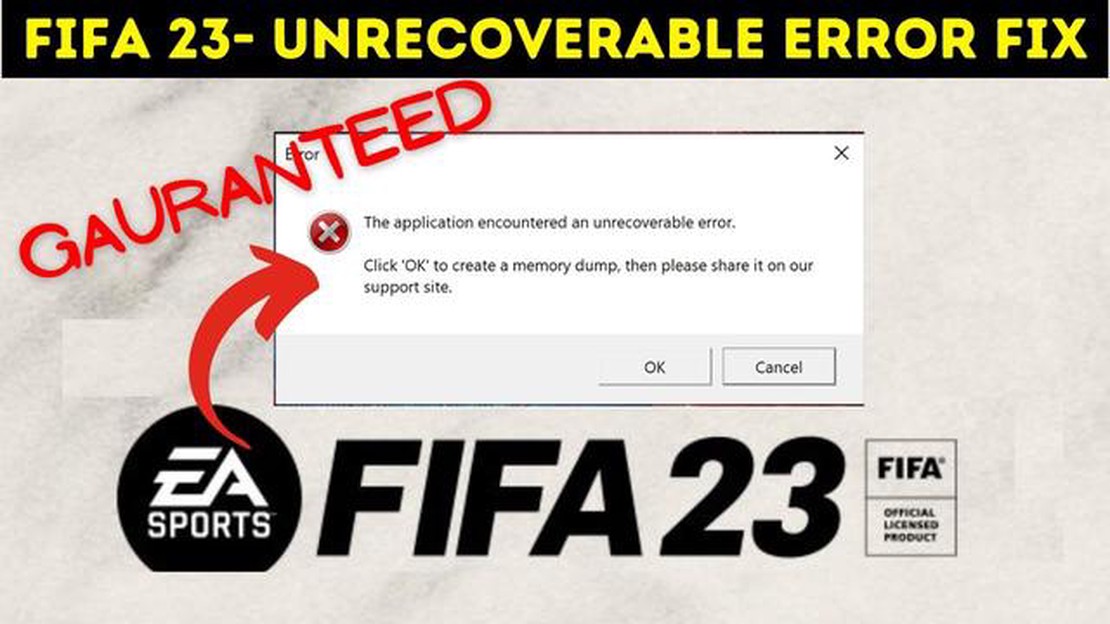
SOLVED: FIFA 23 Unrecoverable Error | Secure Boot Error (Updated 2023) Are you experiencing the dreaded “Unrecoverable Error Secure Boot Error” while …
Read Article
How to find out a person’s name from their photo (2023). Sometimes we face a situation when we would like to know the name of a person we see in a …
Read Article


