
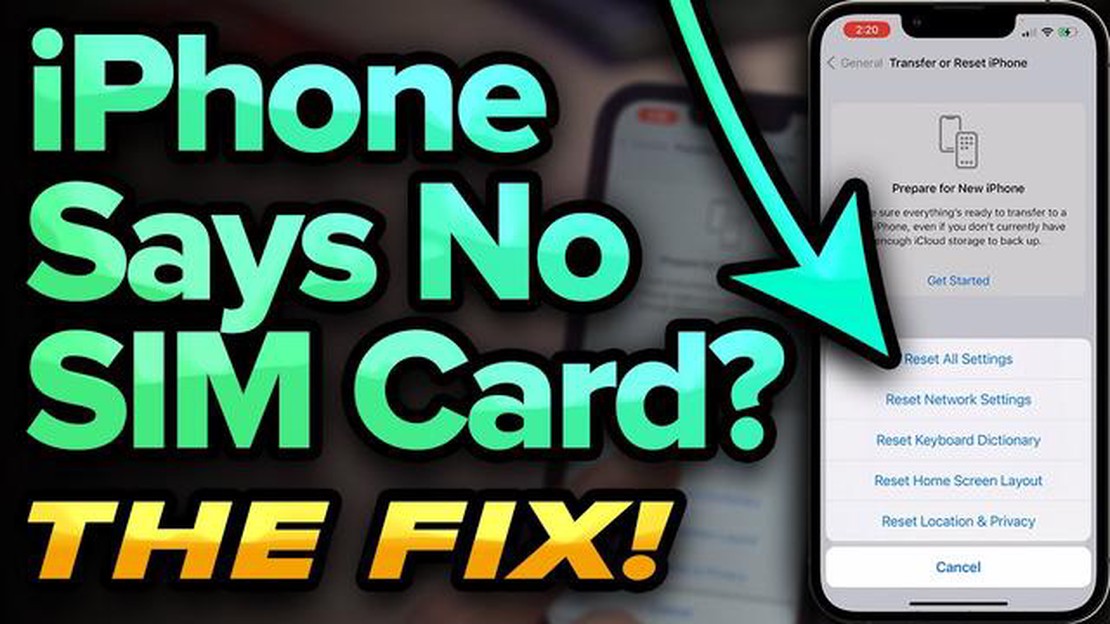

How to fix the error of no installed sim card on iPhone and Android: 12 simple ways
12 easy ways to fix no sim card installed error on iphone and android Sim card is an integral part of operation of many mobile devices including …
Read Article
If you are experiencing audio issues with your Nvidia High Definition Audio on Windows 10, you’re not alone. Many users have reported a complete lack of sound or poor audio quality after installing or updating Nvidia graphics drivers. Fortunately, there are several potential solutions that can help you fix this problem and restore the audio functionality on your Windows 10 machine.
Firstly, it’s important to check if the audio problem is indeed related to the Nvidia High Definition Audio driver. You can do this by opening the Device Manager and expanding the “Sound, video, and game controllers” category. Look for the “Nvidia High Definition Audio” entry and check if there are any warning signs or error messages associated with it. If so, right-click on the entry and select “Update driver” to see if a newer version of the driver is available.
If updating the driver doesn’t solve the issue, you can try disabling and re-enabling the Nvidia High Definition Audio device. To do this, right-click on the entry in Device Manager and select “Disable device”. After a few moments, right-click on it again and select “Enable device”. This can sometimes reset the audio settings and resolve any conflicts that may be causing the problem.
Another potential solution is to uninstall and reinstall the Nvidia graphics drivers. This can help to resolve any compatibility issues that may be preventing the High Definition Audio from working properly. To uninstall the drivers, go to the Control Panel and open the “Programs and Features” or “Uninstall a program” option. Locate the Nvidia graphics driver in the list of installed programs and select “Uninstall”. Follow the on-screen instructions to complete the uninstallation process, and then visit the Nvidia website to download and install the latest drivers for your graphics card.
In some cases, the audio problem may be caused by conflicting audio settings or devices. To troubleshoot this, you can try changing the default audio playback device. Right-click on the sound icon in the taskbar and select “Open sound settings”. Under the “Output” section, click on the drop-down menu and select a different audio device, such as the speakers or headphones connected to your computer. Test the audio to see if the problem is resolved.
If none of the above solutions work, you can also try restoring your computer to a previous restore point. This can help to undo any recent changes that may have caused the audio problem. To do this, open the Control Panel and search for “System Restore”. Follow the on-screen instructions to select a restore point and restore your computer to its previous state.
By following these steps, you should be able to fix the Nvidia High Definition Audio no sound problem on Windows 10 and enjoy uninterrupted audio playback. If none of the solutions work, it may be worth contacting Nvidia support or seeking further assistance from a professional technician.
If you’re experiencing issues with the Nvidia High Definition Audio not producing any sound on your Windows 10 PC, there are a number of steps you can take to fix the problem.
If none of these solutions fix the Nvidia High Definition Audio no sound problem, you may need to contact Nvidia support or consider using external speakers or headphones for audio output.
If you are experiencing no sound issues with Nvidia High Definition Audio on your Windows 10 PC, you can try the following troubleshooting steps:
Read Also: 5 reasons why detection and security systems help schools get back on track12. Press Windows + R, type “services.msc” and press Enter to open the Services window. 13. Scroll down and locate “Windows Audio” and “Windows Audio Endpoint Builder” in the list. 14. Right-click on each service and select “Restart”.
15. Disable audio enhancements:
Read Also: 5 Best Calendar App For Galaxy S10 - Stay Organized with These Top Choices16. Right-click on the volume icon in the taskbar and select “Open Sound settings”. 17. Scroll down and click on “Sound Control Panel” under the “Related settings” section. 18. Under the “Enhancements” tab, check the box that says “Disable all sound effects”. 19. Check for Windows updates: 20. Open the Settings app by pressing Windows + I. 21. Click on “Update & Security” and select “Windows Update”. 22. Click on “Check for updates” and install any available updates for your system. 23. Perform a system restore: 24. If none of the above steps work, you can try restoring your system to a previous point in time. 25. Press Windows + R, type “rstrui” and press Enter to open the System Restore window. 26. Follow the on-screen instructions to choose a restore point and restore your system.
If the issue persists after trying these troubleshooting steps, it is recommended to contact Nvidia support for further assistance.
If you are experiencing no sound issues with Nvidia High Definition Audio on Windows 10, updating the driver can often resolve the problem. Here is a step-by-step guide on how to update the Nvidia High Definition Audio driver:
After the restart, check if the Nvidia High Definition Audio no sound issue has been resolved. If not, you may need to try other troubleshooting steps or seek further assistance from Nvidia or Microsoft support.
If you are still experiencing issues with Nvidia High Definition Audio on Windows 10, here are some additional solutions you can try:
If none of the above solutions work, you may need to contact Nvidia support or seek assistance from a professional technician to resolve the Nvidia High Definition Audio issues on your Windows 10 computer.
If you are experiencing no sound on your Windows 10 computer after installing Nvidia High Definition Audio drivers, it could be due to a variety of reasons. One possible reason is that the drivers may not be compatible with your computer’s hardware or software configuration. Another possible reason is that there may be conflicts with other audio drivers or settings on your computer. You can try troubleshooting the issue by updating the drivers, checking your audio settings, and making sure the audio device is enabled in the Device Manager.
There have been some reported compatibility issues between Nvidia High Definition Audio and Windows 10. These issues can range from no sound, distorted audio, or problems with audio playback. The compatibility issues may be caused by outdated or incompatible drivers, conflicting software, or hardware conflicts. It is recommended to always keep your drivers and operating system up to date to minimize compatibility issues.
Yes, uninstalling and reinstalling the Nvidia High Definition Audio drivers can sometimes help fix the no sound issue. To uninstall the drivers, go to the Device Manager, expand the “Sound, video and game controllers” category, right-click on the Nvidia High Definition Audio device, and select “Uninstall”. After the drivers are uninstalled, you can reinstall them by visiting the Nvidia website or using the Nvidia GeForce Experience software to download and install the latest drivers for your graphics card. Restart your computer after reinstalling the drivers to see if the sound issue has been resolved.
12 easy ways to fix no sim card installed error on iphone and android Sim card is an integral part of operation of many mobile devices including …
Read Article
Call of duty mobile lite may be in development. According to the latest news, Activision Blizzard may be working on the development of the famous game …
Read Article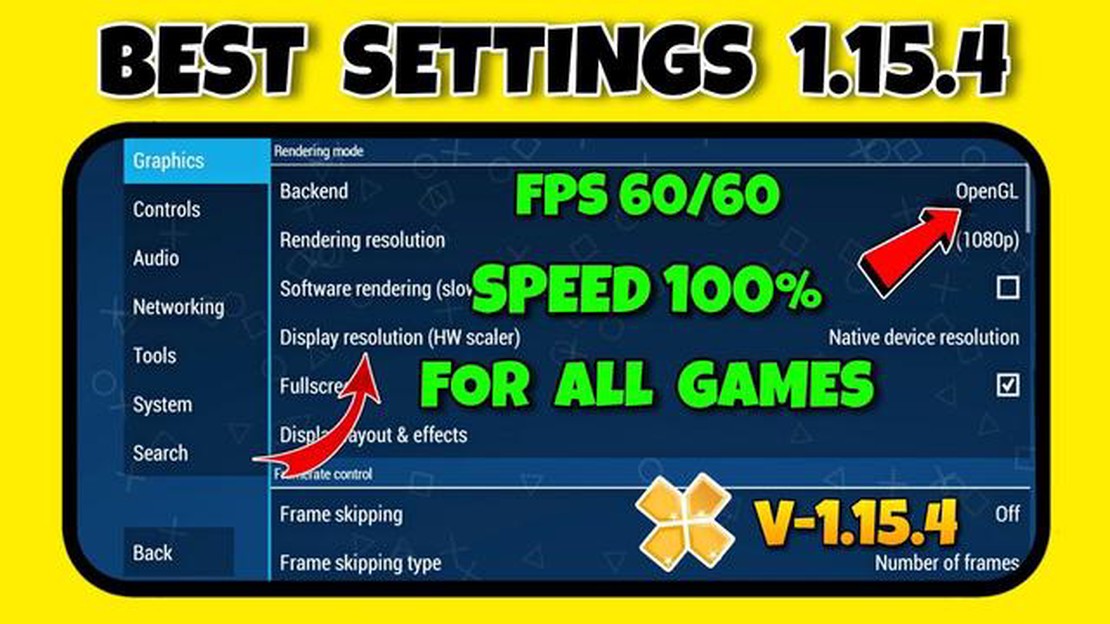
Best Settings For PPSSPP On Android 10 Gaming on your Android device has never been better with the PPSSPP emulator. With the ability to play PSP …
Read Article
Games Missing From Epic Games Launcher Library Quick Fix Having a well-organized game library is crucial for any gaming enthusiast. However, there are …
Read Article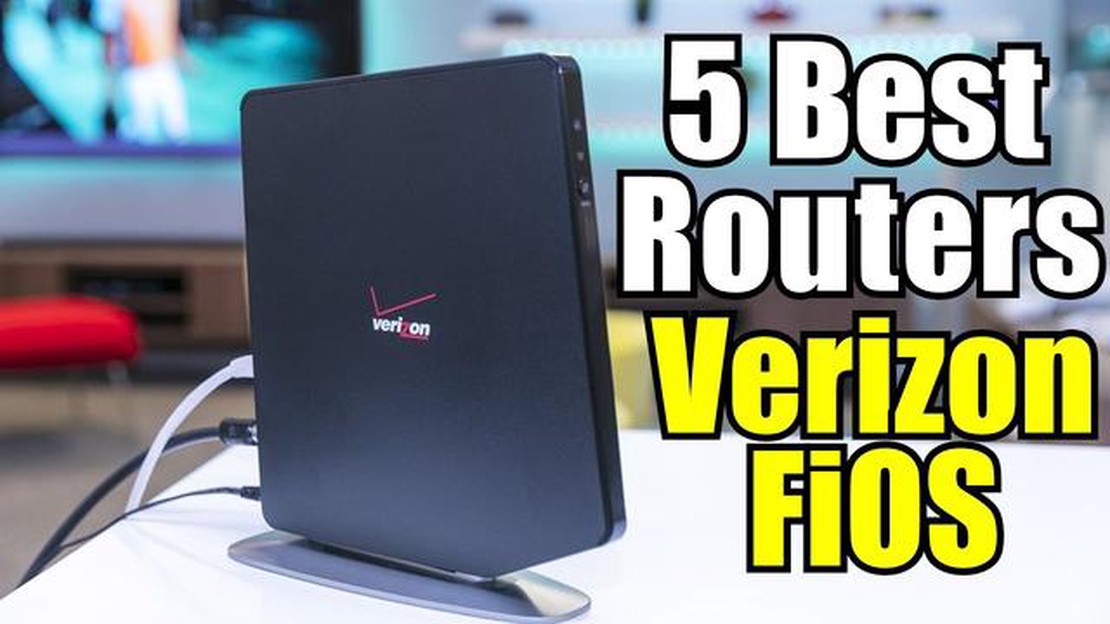
12 Best Router For Verizon FiOS in 2023 Verizon FiOS is a popular high-speed internet service provider that offers lightning-fast connection speeds. …
Read Article
Knockout city xbox series s: not launching? fixed! Bugs and problems when launching games are not uncommon, and the latest Knockout City game is no …
Read Article


