


Fix Apex Legends Error Code 100 | Easy Solutions | NEW in 2023!
Fix: Apex Legends Error Code 100 | Easy Solutions | NEW in 2023! If you are an avid player of Apex Legends, you may have encountered the dreaded Error …
Read Article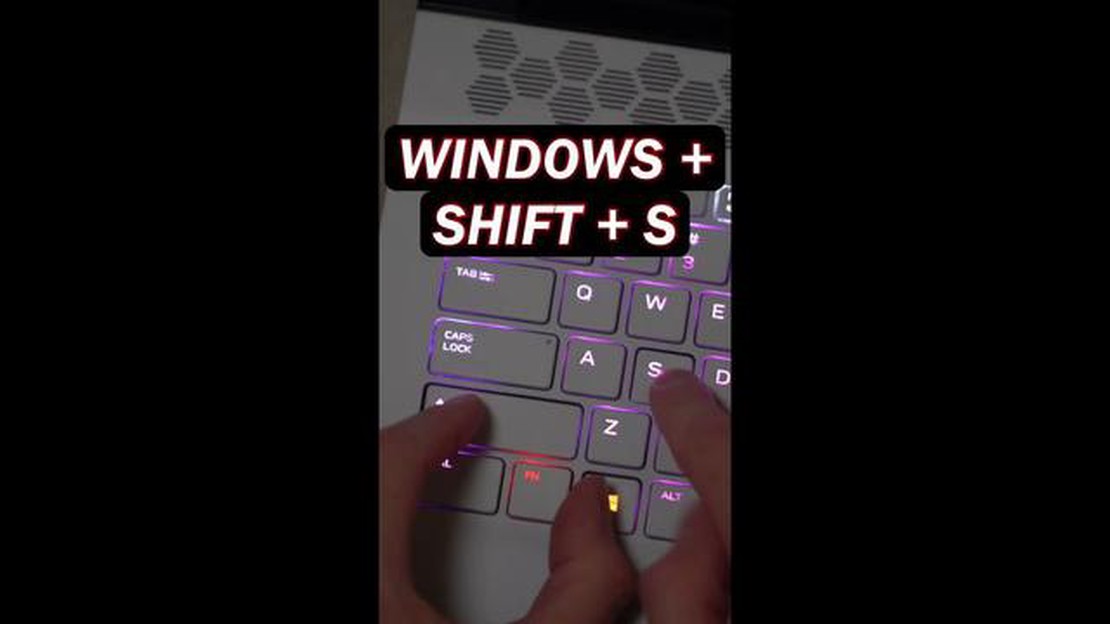
Screenshots have become an integral part of our lives nowadays. They help us share information, solve problems and save important moments. That’s why screen capture is a good skill for every laptop user. But what to pay attention to when creating a screenshot? And in what ways can it be done?
Operating systems have different tools to create a screenshot:.
Each of these methods has its own advantages and disadvantages and is suitable for different situations. To help you make a more informed choice, let’s take a closer look at each method.
A screenshot, or screenshot, is a useful feature that allows you to capture the current view of your screen and save it as an image. In this article, let’s look at four quick and easy ways to take a screenshot on your laptop.
Press the Print Screen or PrtScn key on your keyboard. This key is usually located in the upper right corner of the keyboard. After pressing the key, the screenshot will be copied to the clipboard. 2. Use the Alt + Print Screen key combination:
Press the Alt + Print Screen key at the same time. This method allows you to take a screenshot of only the active window, not the entire screen. 3. Use a special screenshot program:
There are various programs that provide additional options for taking screenshots, such as editing the image or recording video of the screen. 4. Use the built-in Windows Snipping Tool:
Some versions of the Windows operating system have a built-in screenshot tool called the “Snipping Tool”. It allows you to select a specific area of the screen to capture in a snapshot.
The need to create screenshots may arise in various situations, for example, to save an interesting article, to capture a mistake, to share information or to create tutorials. Choose the most convenient method for your laptop and start taking screenshots now!
Most operating systems, including Windows, Mac, and Linux, have built-in tools for taking screenshots. Using these tools is the easiest and fastest way to get a screenshot on your laptop.
Windows:
Read Also: 12 ways to quickly access Task Manager in Windows 10
There are several different screenshot tools available in different Linux distributions, such as GNOME Screenshot, KDE Spectacle, and others. They are usually available through the Applications menu or can be invoked with a keyboard shortcut.
| Operating System | Keys | Keys | Save Screenshot | | — | — | — | | Windows | Print Screen (PrtScn) | To Clipboard / In Image Editor | | Mac | Command+Shift+3 | Desktop | | Command+Shift+4 (+space) | Desktop | | Linux | Different for each distribution | Different for each distribution |
Using the operating system’s built-in tools, you can create screenshots without having to install third-party software. This is a convenient and easy way to capture what’s happening on your laptop screen.
Read Also: How To Fix 7 Days To Die Won't Launch Issue - Troubleshooting Guide
If you need to take multiple screenshots at once or if you want more options to customize your screenshots, you can use special screenshot software.
There are many free programs that allow you to take a screenshot of the screen on your laptop. Here are some of the most popular ones:
To use these programs, you just need to download and install them on your laptop. Once installed, you can easily create screenshots using the appropriate commands or hotkeys.
Screenshot programs also offer additional features such as editing screenshots, adding captions and notes, and the ability to save screenshots in different formats.
However, keep in mind that each program may have its own peculiarities and limitations. Therefore, it is recommended that you read the documentation and instructions to take full advantage of all the features of your chosen screenshot program.
If you are unable or unwilling to use keyboard shortcuts to create a screenshot on your laptop, then you can use online services for this purpose. There are many free online services that allow you to create and edit screenshots right in your browser.
Setting up and using such services is usually quite simple. You will just need to go to the website of the chosen service, load or open the screen you want, and create a screenshot. Some services also allow you to add various elements such as arrows, text comments and markers to make the screenshot more informative.
One of the pros of this method is that you can create screenshots from any internet-connected device, not just your laptop. Also, once you create a screenshot, you can immediately share it with other people by sending a link to it or downloading it to your computer.
Below are a few popular online services for creating screenshots:
This is just a small list of online services available for creating screenshots. You can try different services and choose the one that best suits your needs and preferences.
There are several ways to take a screenshot on a Windows laptop. One of the easiest ways is to use the “Print Screen” or “PrtScn” key combination. Just press this key, then open the image editor, paste the screenshot and save it. You can also use the “Cut and Copy” tool in Windows to select and save only the part of the screen you want.
Taking a screenshot on a Mac laptop is also easy. You can use “Command + Shift + 3” keys to take a screenshot of the whole screen and automatically save it to your desktop. If you need to select only a specific part of the screen, you can use the key combination “Command + Shift + 4”, then select the desired area on the screen and the screenshot will be saved to your desktop.
There are many software tools that allow you to take screenshots on your laptop with additional features. One of the popular programs is Lightshot. It allows you to select the desired area of the screen, add annotations, draw on the image, and more. Another popular program is Greenshot, which also offers additional features such as adding watermarks and editing screenshots.
On Linux laptops, you can use a variety of methods to take screenshots. Some Linux distributions provide built-in tools, for example on OpenSUSE you can use the “Print Screen” or “PrtScn” key combination. Another popular tool is Shutter, which offers advanced features including the ability to take snapshots of selected areas of the screen and add annotations.
Fix: Apex Legends Error Code 100 | Easy Solutions | NEW in 2023! If you are an avid player of Apex Legends, you may have encountered the dreaded Error …
Read Article
How to fix Galaxy Note 8 camera vertical blurred line issue, other Android camera issues If you are a proud owner of the Samsung Galaxy Note 8 and …
Read Article
5 Best Android Phones with microSD Slot for Additional Expandable Memory When it comes to choosing an Android phone, having enough storage space can …
Read Article
Samsung Galaxy A10 won’t connect to WiFi. Here’s the fix. If you own a Samsung Galaxy A10 and are experiencing WiFi connection problems, you’re not …
Read Article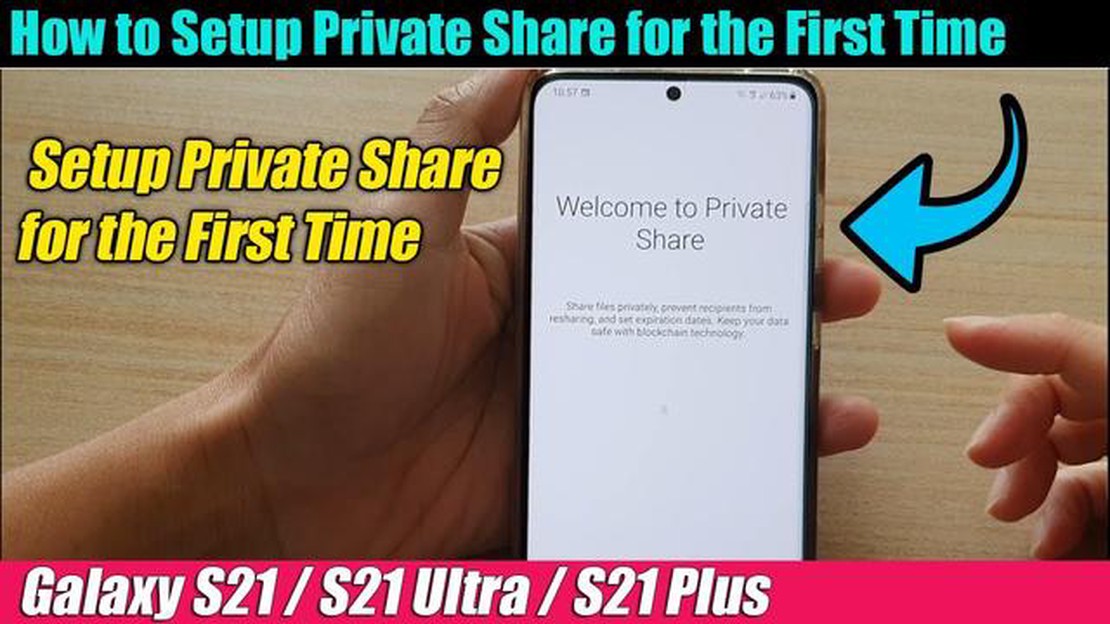
How to Set Up and Use Private Share on Samsung Galaxy S21| Encrypt File Before Sending Are you concerned about the privacy and security of your files …
Read Article
How To Update Animal Crossing: New Horizons | Updated Steps in 2023 Welcome to our comprehensive guide on how to update Animal Crossing: New Horizons …
Read Article


